
HOW TO INSTALL WORDPRESS ON WINDOWS 11 FOR OFFLINE WEBHOSTING?

Many people asked me if WordPress can be installed on general purpose Windows 11 PC and, if yes, how?
Well, today I will share three methods of installing WordPress on your regular Windows laptop and test your WordPress plugins locally.
One of the coolest benefits of installing WordPress on your Windows laptop is, you can test, modify your plugins and themes without needing to install them on your actual website. Let’s start!
Method 1: Using WSL (Windows Sub-System for Linux)
Step 1- Install WSL
Install WSL by performing the following steps:
1. Enter the following command in an administrator PowerShell or Windows Command Prompt and then restarting your machine.

wsl –install
Now, please wait until WSL is installed.
Once the installation is complete, please restart the PC.
2. The above command only works if WSL is not installed at all, if you run wsl –install and see the WSL help text, please try running wsl –list –online to see a list of available distros and run wsl –install -d <DistroName> to install a distro.
Step 2- Install NGINX Webserver
WordPress requires a webserver to function; hence you need to install one.
Now you need to run the following command once you boot the Linux distribution you just installed.
sudo apt update
sudo apt install nginx
After successfully installing NGINX, you need to run the following commands to enable Start and Stop services.
sudo service nginx start
sudo service nginx stop
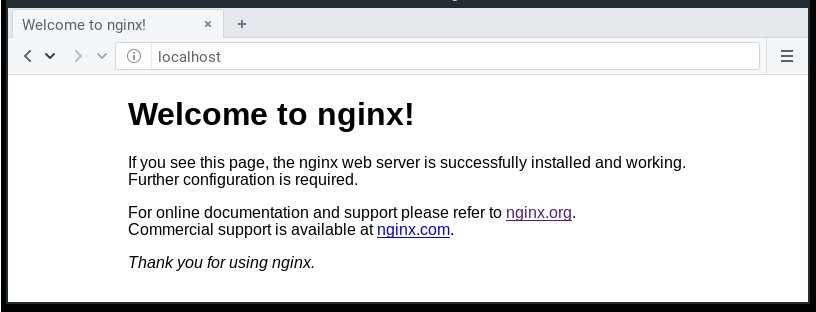
Now let us verify if NGINX is working. Enter http://localhost in any web browser. It should show the following page:
Step 3- Installing Database Server
WordPress stores information in a database server. So, we need to install one. Maria Database Server is most suitable for this purpose. So, let us install it.
Please run the following command inside your WSL Linux distro.
sudo apt install mariadb-server
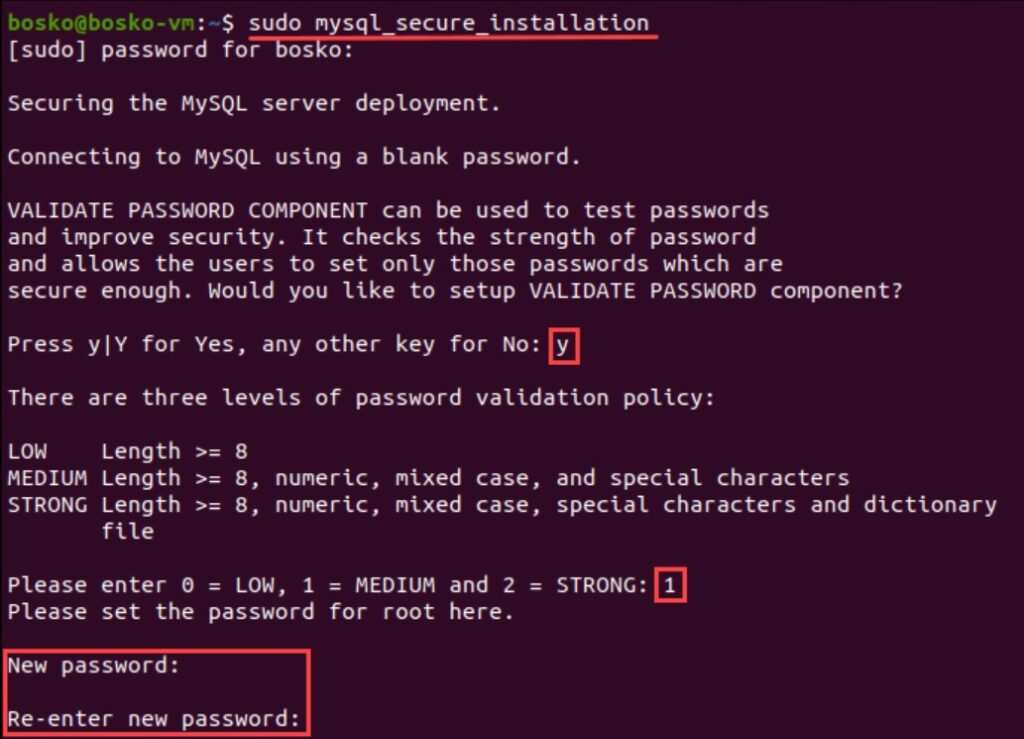
Run another command to assign a root password to secure the database server.
sudo mysql_secure_installation
Now you will be asked to validate secure password component. Press Y and hit Enter.
Enter the password and confirm it by entering the password again.
Step 4- Installing PHP
WordPress is based on PHP. So, this step is a must. Please install PHP by entering the following command.
sudo apt install php-fpm php-common php-mysql php-gmp php-curl php-intl php-mbstring php-xmlrpc php-gd php-xml php-cli php-zip
(Please copy the command to avoid typo)
Step 5- Install WordPress
WordPress can be easily installed now. Enter the following commands to start with.
wget cd /tmp
https://wordpress.org/latest.tar.gz
tar -xvzf latest.tar.gz
sudo mv wordpress /var/www/wordpress
You need www-data to own the WordPress directory. Here is how to get it. Enter the following commands.
sudo chown -R www-data:www-data /var/www/WordPress/
sudo chmod -R 755 /var/www/wordpress/
Now follow the on-screen instructions to successfully install WordPress. You can customize your website now.
METHOD 2: Using XAMPP
What is XAMPP?
XAMPP is a software package that comes with everything you’ll need to set up a local server on your PC.
You’ll need to install a web server software (Apache), PHP, and MySQL on your PC to establish a local WordPress site.
MySQL is a database management system, while PHP is a computer language. Both are essential for WordPress to function.
For beginners, installing each of them separately is fairly challenging. Here’s when XAMPP is really useful.
XAMPP makes it simple to create WordPress websites on your local machine. It is compatible with PCs running Windows, Mac OS X, and Linux.
Step 1- Installing XAMPP
Download XAMPP software package for Windows from this URL: https://www.apachefriends.org/
Run the .exe file to start installation setup.
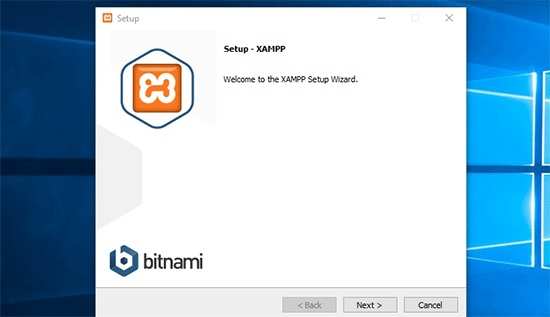
Follow on-screen instructions and complete the installation.
Launch XAMPP control panel app once the installation completes.
XAMPP control panel looks like this:
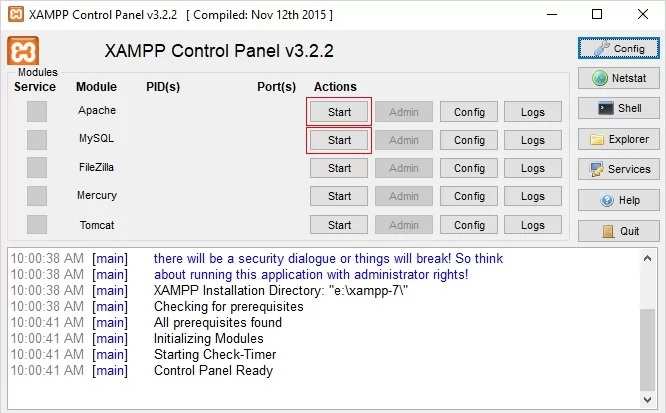
Now, Start Apache Webserver and MySQL Database server. If you see any firewall notification, allow access.
You are now ready to install WordPress.
Step 2- Install WordPress
Please go to wordpress.org and download WordPress.
Extract the .zip file and copy the ‘wordpress’ folder.
Go to XAMPP installation folder (C:/Program Files/XAMPP/htdocs) and paste it.
Note: You should rename the ‘wordpress’ folder to your website’s name.
Now, open any web browser and enter https://localhost/’YourWebsiteName’/
This will start the installation process. Select a language and follow on-screen instructions to complete the installation.
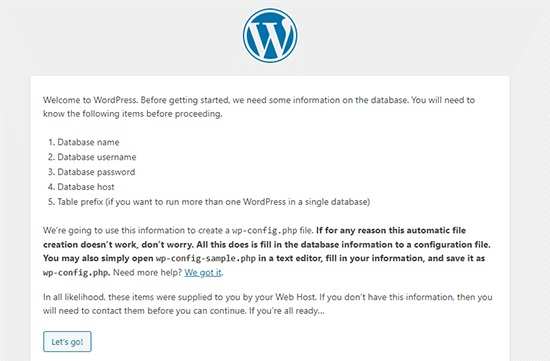
WordPress is now installed. Let’s create a database for your WordPress site.
Step 3- Create WordPress Database
Open a browser tab and enter https://localhost/phpmyadmin/
This will open the phpMyAdmin console.
Click on Database, type a name for the new database and click on Create to proceed.
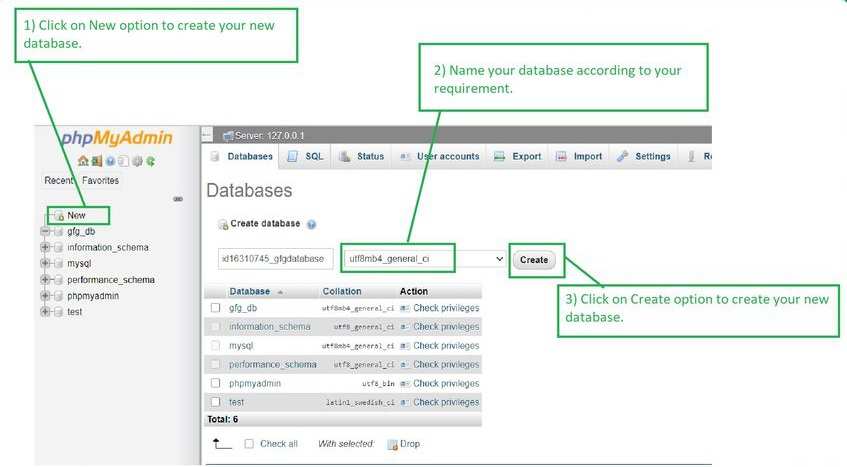
Now, you are all set!
Now go back to https://localhost/’YourWebsiteName’/ and click ‘Let’s Go’ button.
Follow the on-screen instructions and fill the database information.
Enter the database name you created earlier. Your username is ‘root’ and you should leave the password field blank. You need to use localhost for database host field.
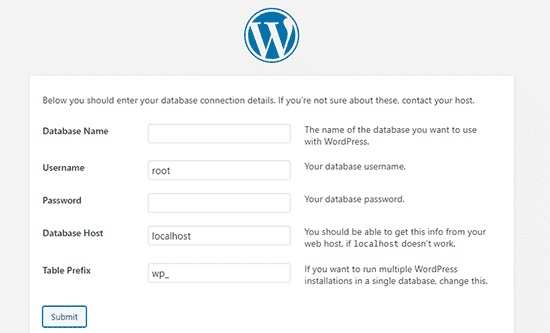
Click ‘Submit’ once you are done.
WordPress will ask you to enter information about your website. Choose a title for this site and enter the same.
Enter a username, password, and email address for your admin account.

Once you have filled all the required information above, click Install WordPress.
WordPress will now install and let you know when it’s done.
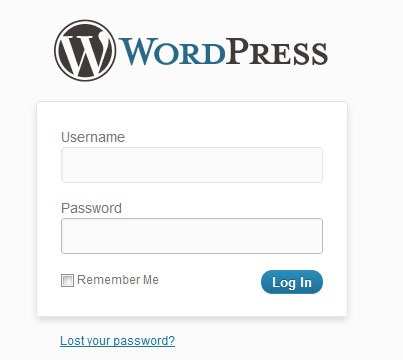
Login to your local website at /localhost/website1/wp-admin page. Enter the username / password that you entered during installation.
METHOD 3- Using Instant WP App
This is probably the easiest way to install WordPress on a Windows PC. But, some of its features are premium. You can use InstantWP’s basic features for free though.
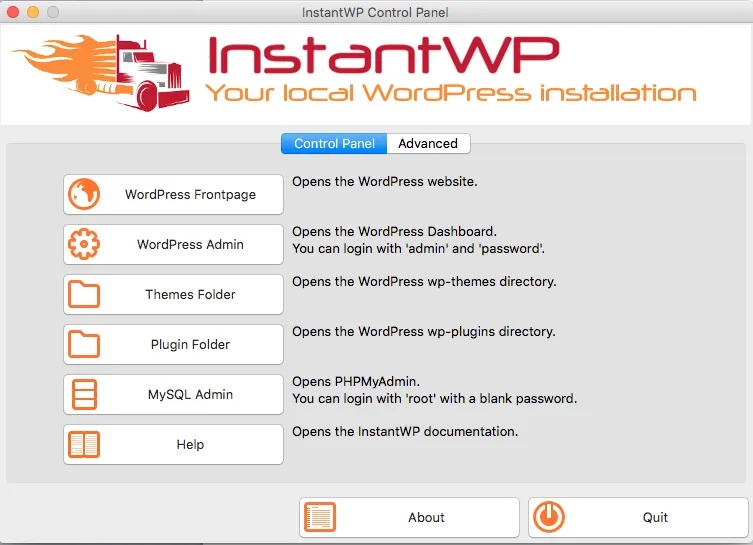
Go to InstantWP’s website https://instantwp.com and download the .exe installation file.
Create a separate folder to store the installation files.
Install the package by simply double clicking on it. Complete the installation. Select the new folder you created as destination folder.
Once installation is completed, please go to the installation folder and open InstantWP.
Click on the WordPress Admin button to start the InstantWP.
Now you will see the WordPress server login page. Enter the credentials to sign-in.
I hope this post will help you setting up WordPress locally on you Windows PC. Please leave a comment and suggest topics I should cover next.